Table Rate Shipping Pro
This plug allows you to define complex shipping rules that will allow you to ship your product all over the world at the correct shipping cost.
Whilst every store is unique and has its own individual needs, the plugin has been designed to provide enough flexibility to cater for your stores needs
If you need help at any time with this plugin you can reach us at https://jem-products.com/contact-us/
Installation
Your plugin is delivered as a zip file. WordPress makes it easy to install the plugin from this zip file. You need to make a note of where you have saved your zip file to on your computer.
From your WordPress dashboard goto “Plugins” the “Add New”
Towards the top of the page you should see an “Upload Plugin” button – see the screenshot below
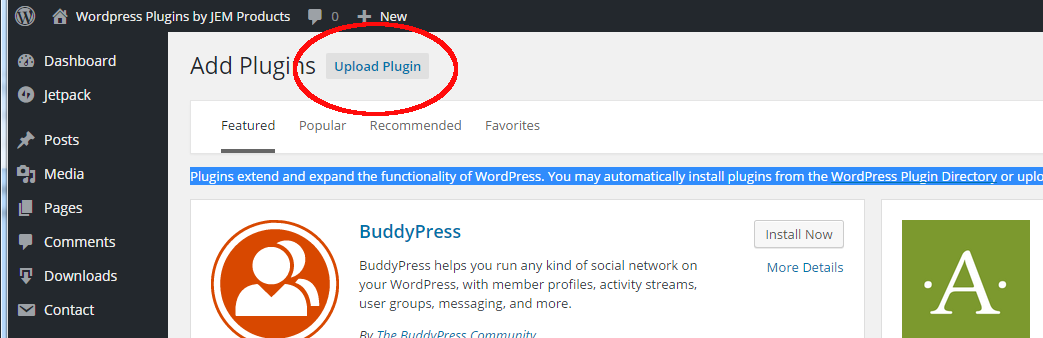
Click the “Upload Plugin” button, then from the next page click the “Choose File” button and select the zip file that you saved.
Getting Started
The first thing you need to do is spend some time thinking about what you want your shipping rules to look like. A little time spent now will make the whole process incredibly smooth and simple!
To create your rules, the plugin uses shipping classes, shipping services and shipping zones.
Shipping Classes
Shipping classes are provided by Woocommerce and allow you to group similar products together. For example you might have some items that are ‘Bulky’ and need to be shipped via their own shipping service (say ‘Freight’). In this instance you would create a shipping class of ‘Bulky’ and apply it to the relevant products.
For more information in setting up shipping classes please click here http://docs.woothemes.com/document/product-shipping-classes/
Shipping Types
Shipping Types are the various shipping methods you use. For example you might have “Standard Shipping”, “Express Shipping” and “Freight”. You would define these 3 shipping types. The shipping types can be selected by the customer – for example the customer could choose standard shipping or the more expensive express shipping.
If you do not offer multiple shipping methods you can ignore this and leave the Shipping Types empty.
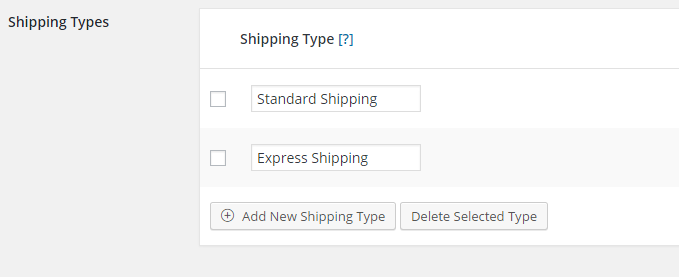
In the examples in this manual we are going to use 3 shipping types:
- Standard Shipping
- Express Shipping
- International
To set up these shipping types:
- Navigate to Woocommerce->Settings->Shipping->Table Rate Pro
- Scroll to the bottom of the page to the Shipping Types section
- Click Add New Shipping Type
- Enter the name of the shipping type (this is what the customer will see so make it meaningful to them.
- Click Save Changes
Here is an example with 3 shipping types defined.

Shipping Zones
Shipping zones define the geographical areas that a set of shipping rates apply to.
For example if you were based in the United Kingdom, you might have one Shipping Zone as “UK” and one as “Europe”. In that way you could create a set of rates for items shipped to the UK and different set of rates for items shipped to Europe.
If you your based in the USA, you might have one shipping zone as “USA” and one as “Canada”. Again this would then allow you to create a set of rates for items sipped to the USA and a DIFFERENT set of rates for items shipped to Canada.
Shipping zones provide an amazing amount of flexibility. You can create a zone by one or more countries e.g. “United Kingdom” or “France, Germany & Switzerland”. You can also create a zone by states of that country. For example in the USA you might group the contiguous 48 states as a zone. Finally you can be very fine grained and define a zone based on the Postal/Zip code.
There is also a special zone that is ALWAYS included, that is the “Default Zone (Everything Else)”. This special zone will apply to any destinations that are NOT included in any other zone. Using the example above, if you had a UK zone and a Europe zone, the Default Zone would capture items shipped everywhere else in the world. This zone is provided for your convenience, you do not need to use it but for many customers it makes sense.
So to do this:
- Navigate to Woocommerce->Settings->Shipping->Table Rate Pro
- In the Table Rates section, click Add New Shipping Zone
- In the Shipping Zone Name enter the name you would like to call this zone
- For Zone Type select either Country, States or Zip/Postal Code
- In the Values box select enter the values for this zone
- Click the Save Changes button at the bottom of the page
Shipping Rates
The plugin will calculate the shipping rates as follows:
- Determine which Shipping Zone is valid based on the customers destination address
- For the valid Shipping Zone find all the rates that are valid for the cart contents – if there are multiple rates it will pick the cheapest.
- Add the handling fee at the end
If you have multiple shipping classes the plugin will calculate each cost for each class and then ADD them together.
How to Add a Shipping Rate
- Navigate to Woocommerce->Settings->Shipping->Table Rate Pro
- Scroll down to the Shipping Zone you are adding rates for
- Click the Add New Rate button
- Enter the rate details as defined below

Shipping Type
You can select one of the shipping types you have already created, or if you are not using them, select none.
Class
Select the shipping class that you would like this rate to apply to. In addition to selecting an existing shipping calls, the plug has 2 built-in choices:
- No Class Set – selecting this option will apply this rate that do NOT have a shipping class
- Any Class – selecting this option will apply this rule only to items that have ANY shipping class.
Condition
This defines how the rate will be evaluated, your two choices are
- Weight (kg/lbs) – the rate will be evaluated based on the weight of the cart/items
- Total Price – the rate will be evaluated based on the cost of the cart/items
Min Value
The minimum value for this rate. The format is in decimals e.g. 50.01 and it is inclusive
Max Value
The maximum value for this rate. The format is decimals e.g. 99.99 and is inclusive. To indicate an unlimited maximum use an asterisk – *
Base Amt
This is the base shipping cost for this rate. The format is decimals e.g. 9.99
Per Item
The additional cost per item for this rate. The format is decimals e.g. 0.50
Per kg/lb
The additional cost per kg/lb for this rate. The format is decimals e.g. 1.99
- Continuing adding rates as applicable
- Click the Save Changes button
Examples
The usage of this plugin is best shown using a couple of examples
In this example we will assume a simple shipping methodology for a company. The company is based in USA and ships to the USA, Canada and Internationally
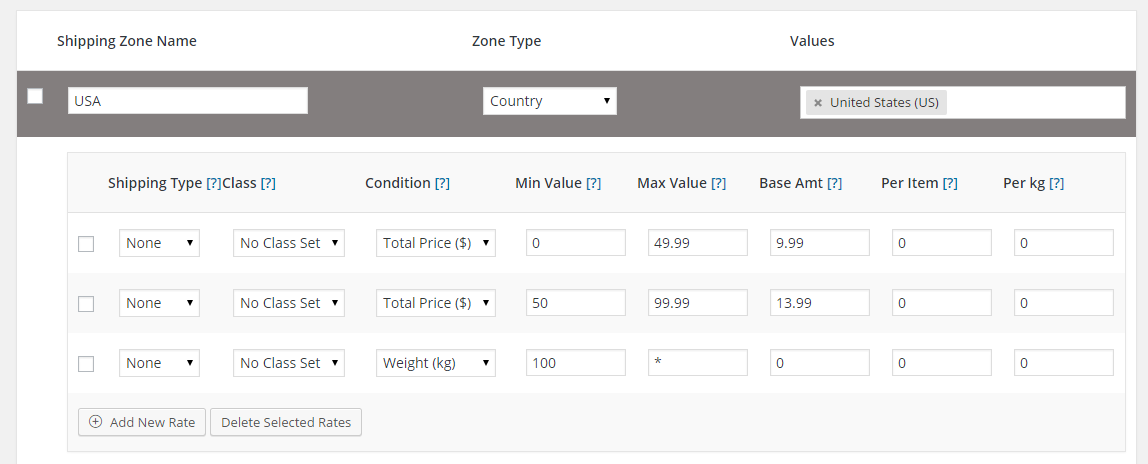
In the USA
For orders between $0.00 – $49.99 the shipping is 9.99
For orders between $50.00 – $99.99 the shipping is 13.99
For orders $100 or greater the shipping is free
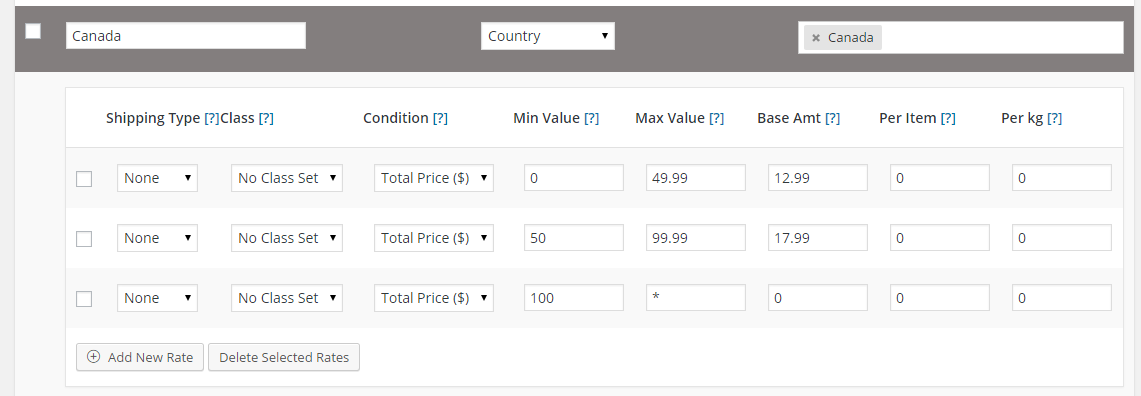
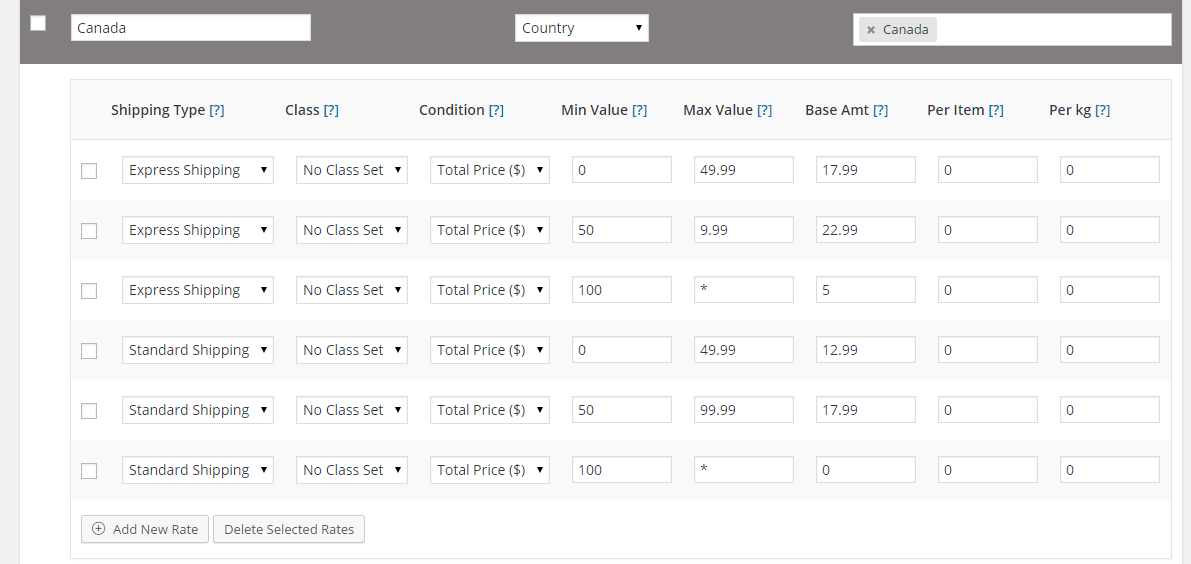
In Canada
For orders between $0.00 – $49.99 the shipping is 12.99
For orders between $50.00 – $99.99 the shipping is 17.99
For orders $100 or greater the shipping is free
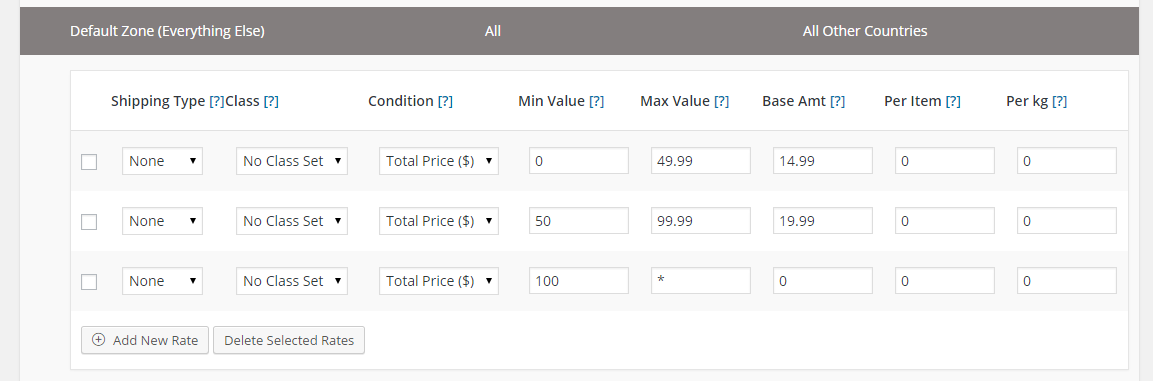
Internationally
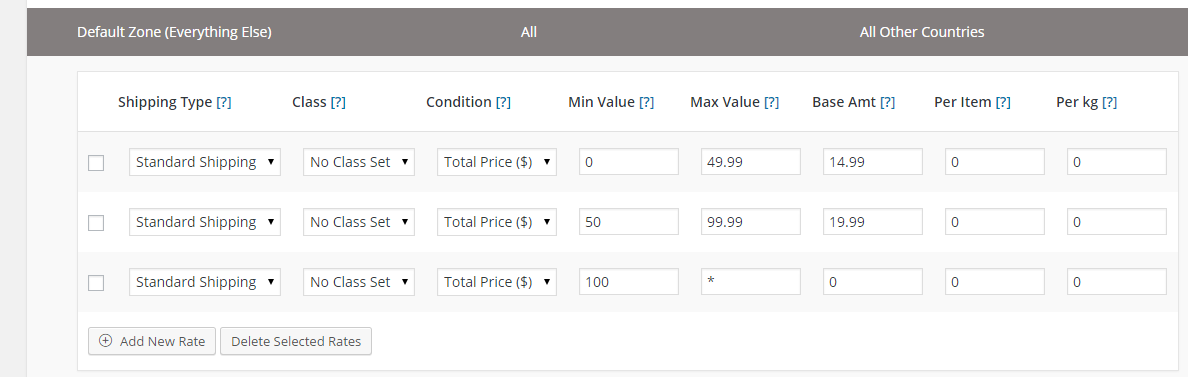
For orders between $0.00 – $49.99 the shipping is 14.99
For orders between $50.00 – $99.99 the shipping is 19.99
For orders $100 or greater the shipping is free
In this example we will not be using any shipping classes.
First we will set up 2 shipping zones: USA & Canada. We will use the Everything Else zone to handle all of the other countries.
First add the USA Shipping Zone
Now add the Canada Shipping Zone
Finally we will use the Everything Else default zone to handle all of the other countries in the world
Example 2
In this example we will build on example 1 and add in different shipping services: Standard Shipping, and, Express Shipping.
Standard & Express shipping will be available in the USA and Canada, but only Standard Shipping is available internationally.
Express Shipping will be $5 more expensive than standard shipping
First let’s set up the shipping types
Next we will set up the Standard & Express shipping for the USA

And the same for Canada
Finally let’s set up just Standard Shipping for Everything Else
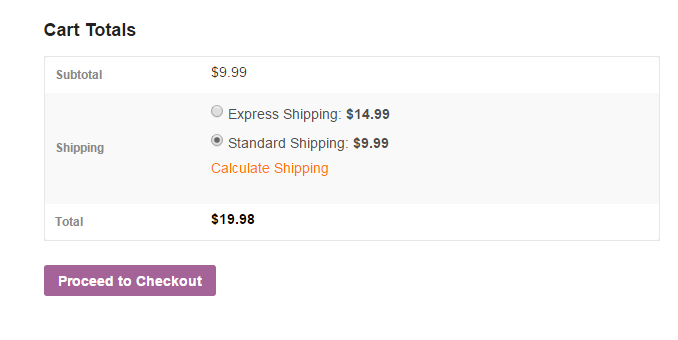
Finally this is how it looks for a US Shipping Address.