Beginners Guide to WooCommerce Shipping Zones
Setting up shipping in WooCommerce can be a real challenge for store owners and managers. Each store will often have its own individual needs and there is a wide array of plugins (some free some paid) that help meet those needs. In this tutorial I’m going to show you how to use shipping zones in your WooCommerce store
A shipping zone is just a geographic area. You set up the shipping zones that make sense for your business and shipping requirements. For example if you only ship to one country and it costs the same to ship anywhere in the country, you may only have one shipping zone.
Maybe you have more of an international flavor and you’re based in Europe and ship to 15 different countries, each with their own shipping calculations, in which case you might have 15 zones.
Both those examples are using countries as the geographic boundary, but WooCommerce provides a lot of flexibility when it comes to defining shipping zones. It also allows you to use states or regions and also Postal codes/Zip codes. This provides you with a great deal of flexibility.
You can choose from a number of different ways to define your region. Some of the ways you define a region include:
- Country – simply a whole country e.g. USA, France, Japan, Italy, Canada etc
- States within a country – Many countries subdivide their are into regions or states. For example in the USA they have New York, Florida, California etc. In Canada they have Alberta, British Columbia etc
- Zip Codes/Postal Codes – You can get very granular and define a region based on the local Postal Codes/Zip Codes
There is also a default zone called “Locations not matched by other zones”. You can optionally assign shipping methods to this zone. Think of this as ‘catch all’ zone that will match if none of the others do.
Although not perfect this system is pretty powerful and meets the needs of thousands of stores around the world.
Your customers will only see shipping rates that apply to the region that they belong to. The zones are checked in the order they are listed, so if a customer can match multiple zones the first that is made will be the one used. The order is important as you can use it to control the shipping rates calculated
For example if you provide manual delivery for orders inside your zip code (say they are convenient to your store) but you ship to the rest of the USA you will need to make sure the zip code zone is ABOVE the USA zone so it gets matched first
Adding a Shipping Zone
To set up a shipping zone navigate to:
WooCommerce -> Settings
Then click the “Shipping” tab at the top of the screen

If you have not set up any shipping zones you should see a screen that looks like this
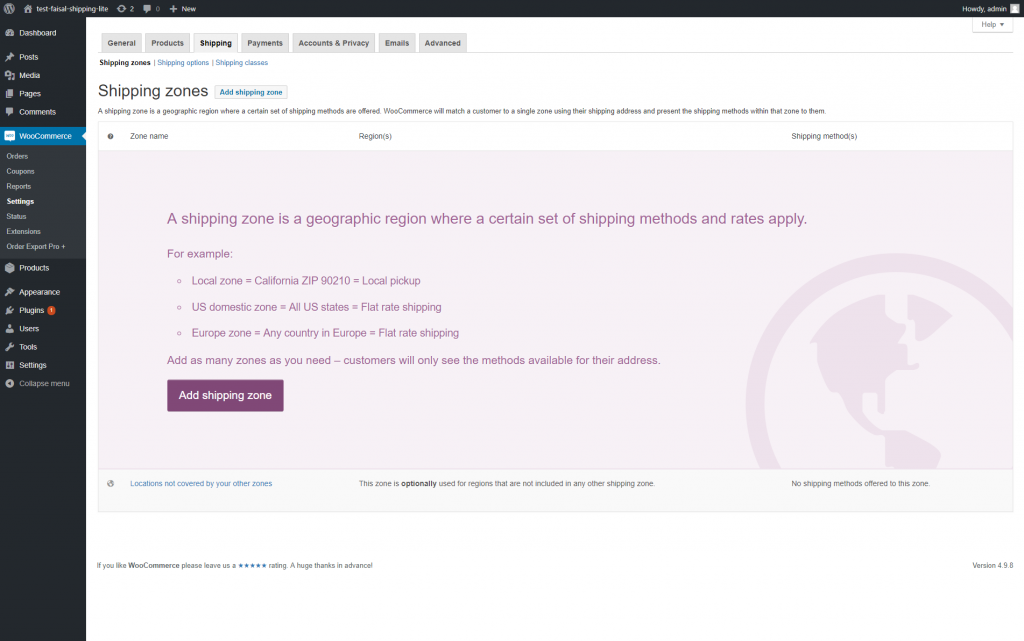
Notice at the very bottom of the screen is built-in shipping zone: “Locations not covered by your other zones”. You can think of this as the catch-all bucket that you can use. You don’t have to use it – but in some cases it might make sense. In one of the examples later we will use this zone so you’ll get to see exactly how it works.
From this screen you are able to add new shipping zones as well as edit any existing ones. To set one up simply click the “Add shipping zone” button and you’ll be taken to a screen to setup the zone
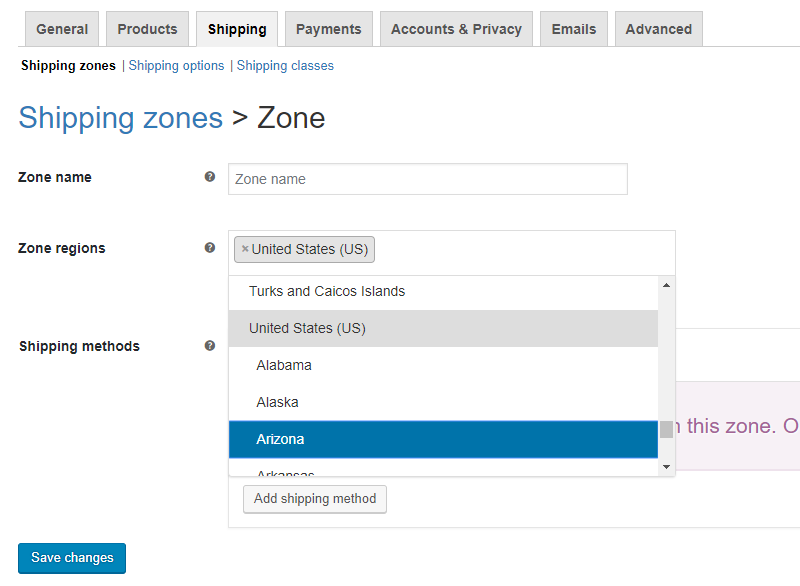
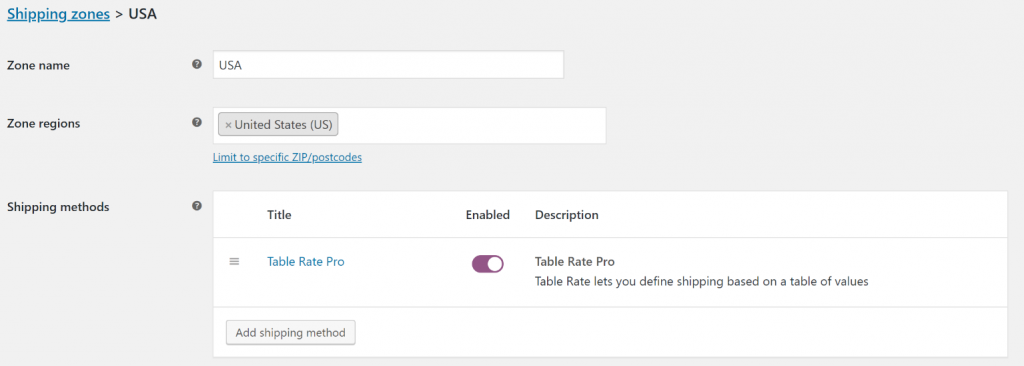
Notice in this example that not only can you pick a country (in this case United States) but if a country has regions or states they will be listed as well – in this example you can see the beginning of the States in the US. NOTE: these states are regions are defined by WooCommerce, they are built-in and our Table Rate Shipping plugin does not change them.
If you would like to enter zip codes/post codes then click the “Limit to specific ZIP/postcodes link (see below)

And you an input box will appear that allows you to enter them:

Assigning a Shipping Method
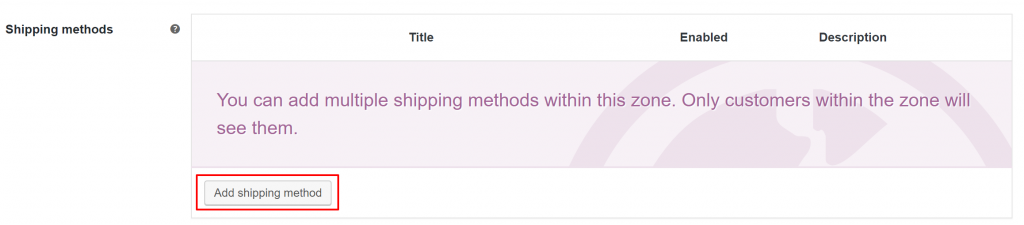
Now you have the geography of your zone all set you need to add a shipping method. A shipping method is simply the way in which shipping will be calculated. There some built-in shipping methods and there are many available as plugins (like our Table Rate Shipping plugin). You are not limited to just one shipping method, you can add as many as you want. The good news is our plugin is likely to fit your needs so you should be able to use just one shipping method, making your shipping setup easier and simpler!
To add a shipping method simply click the “Add shipping method” button
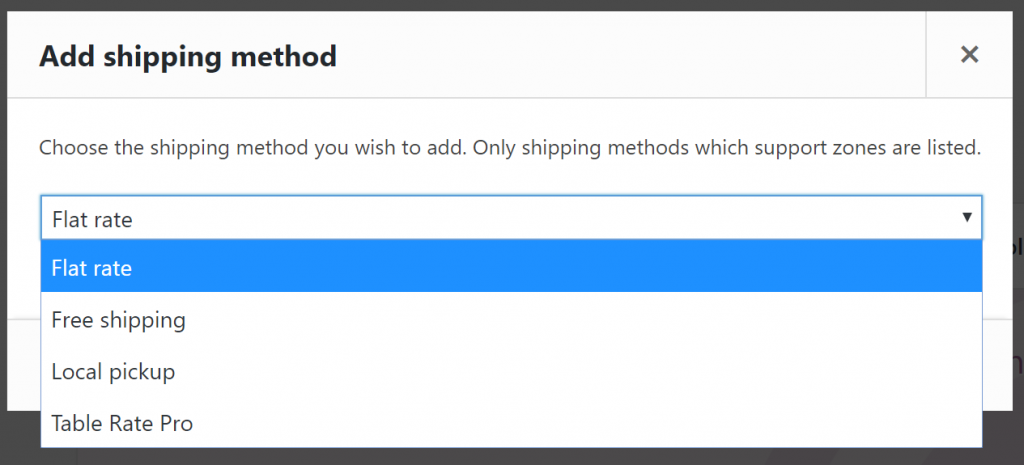
Simply select the shipping method you’d like to add – in our case it will be “Table Rate Pro” and click the add “Add shipping method” button to confirm it. That will then add that shipping method to your zone and you will see it listed as one of the shipping methods similar to the screenshot below.