Recording a Microsoft Teams meeting is a bit like saving a sandwich for later. You may not need it now. But when someone asks, “Wait, what did we decide?” you will be very glad it exists.
TLDR: You can record a Teams meeting by joining the meeting, opening More actions, and choosing Start recording. Teams tells everyone that the meeting is being recorded, so there are no sneaky spy movie vibes. When the meeting ends, the recording is saved to OneDrive or SharePoint. You can then watch it, share it, download it, or delete it if needed.
Before You Hit Record
First, take a tiny pause. Recording is powerful. It captures voices, screens, video, chat details, and sometimes transcripts. So it is smart to know the rules before you click the button.
In many workplaces, only certain people can record. Usually, the meeting organizer, co-organizers, or people from the same company can start a recording. Guests may not be able to do it. Anonymous users usually cannot do it either.
Also, tell people you plan to record. Teams will show a recording notice, but a quick spoken heads-up is polite. It keeps the meeting friendly. It also helps avoid awkward “I did not know this was being recorded” moments.
- Ask permission if your company requires it.
- Check your role in the meeting.
- Close private tabs before sharing your screen.
- Mute background noise if you can.
- Know where the file will go after the meeting.

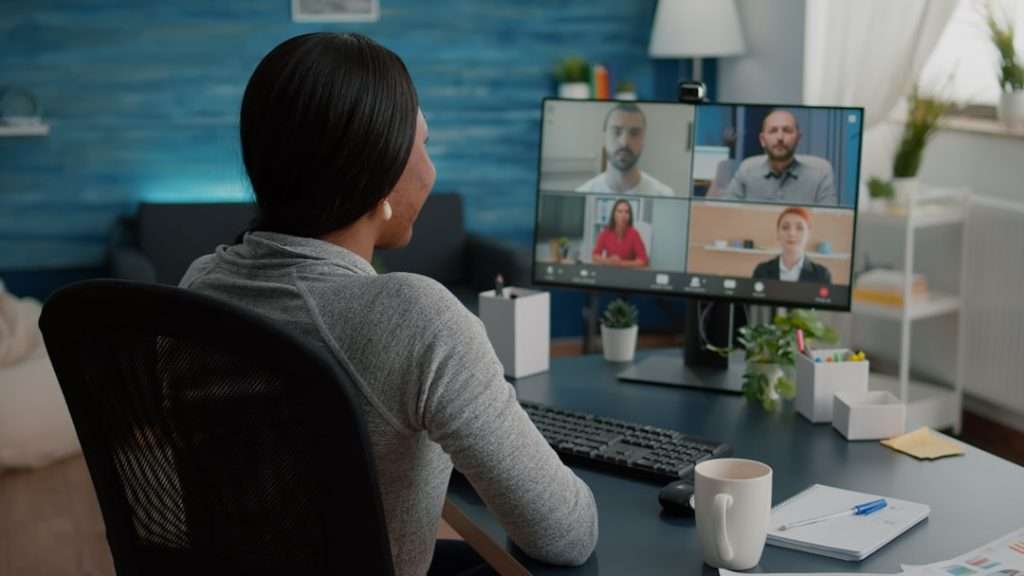
Step 1: Join the Microsoft Teams Meeting
Open Microsoft Teams. Go to your calendar. Find the meeting. Click Join. Easy start.
Before entering, check your camera and microphone. This is your mini backstage moment. You can turn the camera on or off. You can choose the right microphone. You can also blur your background if your laundry is making a guest appearance.
When you are ready, click Join now. You are in.
Step 2: Find the More Actions Menu
Once you are inside the meeting, look at the meeting controls. These are usually at the top or bottom of the screen. The layout may change depending on your Teams version.
Find the button with three dots. It is called More actions. It may look small, but it holds many useful tools. Think of it as the magic drawer of Teams.
Click More actions.
Step 3: Start the Recording
In the menu, look for Record and transcribe. Hover over it or click it. Then choose Start recording.
That is the big moment. Teams will begin recording the meeting. Everyone in the meeting will see a notice that recording has started. This is normal. This is good. No secret agent behavior here.
If transcription is available, you may also see an option to start transcription. A transcript creates written text from what people say. It is very useful. It helps people search the meeting later. It also helps anyone who prefers reading over watching.
- Click More actions.
- Select Record and transcribe.
- Click Start recording.
- Wait for the recording notice.
- Continue your meeting like a pro.
Step 4: Run the Meeting Normally
Now, just have the meeting. Talk. Share your screen. Present your slides. Make your brilliant points. Nod wisely when others speak.
The recording will capture the meeting audio. It will also capture shared screens. If people turn on cameras, their video may be included too. The exact view can depend on Teams settings and the meeting layout.
If you share your screen, be careful. Close private documents. Hide sensitive tabs. Turn off pop-up notifications if possible. Nobody needs to see your dentist reminder or your very serious search for “best office chair for back pain.”
A good recording is clear and focused. Try these simple tips:
- Speak clearly. Your future self will thank you.
- Say names before asking questions.
- Repeat key decisions out loud.
- Pause after important points. It helps the transcript.
- Use screen sharing wisely. Show only what matters.

Step 5: Stop the Recording
When the important part is finished, you can stop the recording. You do not have to wait until the meeting ends.
Click More actions again. Go to Record and transcribe. Then click Stop recording.
Teams may ask you to confirm. Confirm it. The recording will stop for everyone. If transcription was running, it may stop too.
If nobody stops the recording, Teams usually stops it when the meeting ends. Still, it is better to stop it yourself. This avoids recording five minutes of people saying goodbye, waving, and asking, “Are we still recording?”
Step 6: Find the Recording
After the meeting, Teams saves the recording. It may take a little time to process. So do not panic if it does not appear instantly. Go stretch. Drink water. Pretend you are not refreshing the page.
Where does the recording go? That depends on the meeting type.
- Channel meetings: The recording is saved in the team’s SharePoint files.
- Regular meetings: The recording is saved in the organizer’s or recorder’s OneDrive.
- Meeting chat: A link to the recording usually appears in the chat.
Open the meeting chat. Look for the recording card or link. Click it to watch. If you are allowed, you can also share, download, copy the link, or change permissions.
Step 7: Watch and Review the Recording
Click the recording link. It will open in Microsoft Stream, OneDrive, or SharePoint. Microsoft has changed how recordings are stored over time, so your view may look different. But the idea is the same. Click. Watch. Learn. Snack optional.
You may see playback controls. You can pause, skip, change speed, or turn on captions if available. If there is a transcript, use it. It can help you jump to a topic fast.
This is great for finding action items. It is also great for catching the name of that tool someone mentioned once and then everyone moved on like it was obvious.
Step 8: Share the Recording
To share the recording, open it in OneDrive or SharePoint. Click Share. Choose who can access it. You may be able to share with specific people, your organization, or people who already have access.
Be careful here. Meeting recordings can contain private information. Do not send the link to everyone unless everyone truly needs it.
Use these sharing rules:
- Share with specific people when the meeting is sensitive.
- Use view-only access if people do not need editing rights.
- Avoid public links unless your company allows them.
- Check permissions before sending the link.
- Remove access when it is no longer needed.

How to Record a Teams Meeting on Desktop
The desktop app is the most common way to record. It works well on Windows and Mac. The steps are simple.
- Open the Microsoft Teams desktop app.
- Join your meeting.
- Click More actions.
- Choose Record and transcribe.
- Click Start recording.
- To stop, return to the same menu.
- Click Stop recording.
That is it. No cape required.
How to Record a Teams Meeting on the Web
You can also use Teams in a browser. This is helpful if you do not have the app installed. It may work best in Microsoft Edge or Google Chrome.
Join the meeting from the Teams web app. Then click More actions. Choose Record and transcribe. Click Start recording.
If you do not see the option, do not scream into the keyboard. The feature may be blocked by your browser, your organization, or your meeting role. Try the desktop app if possible.
How to Record a Teams Meeting on Mobile
You can record from the Teams mobile app if your organization allows it. The steps are similar.
- Open the Teams app on your phone.
- Join the meeting.
- Tap the More options button.
- Look for Start recording.
- Tap it.
- To stop, go back to the same menu.
Mobile recording is handy. But desktop is often better for big meetings. It gives you more control. Also, your phone battery will not look at you with fear.
What If You Cannot See the Record Button?
This happens a lot. Do not worry. Teams is not broken. It may just be following rules.
Common reasons include:
- You are a guest.
- You are joining from outside the organization.
- Your admin has turned off recording.
- The meeting policy does not allow recording.
- You are using a version of Teams that does not support it.
- The meeting type does not allow recording.
If you need to record, ask the organizer to do it. Or ask your IT admin to check the meeting policy. Very official. Very grown-up.
Can You Record Without Teams Recording?
Technically, some people use screen recording tools. But be careful. Your company may not allow that. Local laws may also require consent. Secret recordings can cause big problems. They are not cute. They are not clever. They are trouble wearing a tiny hat.
The safest method is to use the built-in Teams recording feature. It notifies everyone. It stores the file in your company system. It also follows admin settings.
How Long Are Teams Recordings Kept?
Your organization may set an expiration date for recordings. Some recordings may expire after a certain number of days. Others may stay longer. You may see an expiration notice near the recording file.
If you need the recording for a project, download it or move it to the right folder if allowed. If you do not need it, let it expire. Digital clutter is still clutter. It just does not fall out of a closet.
Best Practices for Great Teams Recordings
A recording is only useful if people can understand it. So make it clean and easy to follow.
- Start recording after small talk. Save people from weather chat.
- State the meeting goal at the beginning.
- Use an agenda. It keeps everyone on track.
- Announce decisions clearly. Say, “The decision is…”
- List action items before the meeting ends.
- Stop recording before casual chat begins.
- Name the recording clearly if you move or copy it.
Quick Troubleshooting
If the recording fails, try these fixes:
- Update Teams. Old apps can act weird.
- Restart the app. Classic magic.
- Check your internet. Recording needs a stable connection.
- Ask the organizer to start the recording.
- Check storage permissions in OneDrive or SharePoint.
- Contact IT if policies block recording.
Final Thoughts
Recording Microsoft Teams meetings is simple once you know where to click. Join the meeting. Open More actions. Choose Start recording. Stop it when you are done. Then find the file in the meeting chat, OneDrive, or SharePoint.
The real trick is not just recording. It is recording well. Tell people first. Keep the meeting clear. Share the file carefully. Then your recording becomes a helpful time machine, not a messy mystery video.
Now go forth and record wisely. Your future notes will be shorter. Your teammates will be happier. And nobody will have to ask, “Can someone remind me what we agreed on?” quite so often.