1. Home
  2. /
  3. KnowledgeBase
  4. /
  5. Table Rate Shipping Pro
  6. /
  7. How to Import & Export Shipping Rates into WooCommerce

Complete Guide: How to Import & Export Shipping Rates into WooCommerce

Setting up Shipping in WooCommerce can be a real pain if you have lots (sometimes hundreds) of different rates you need to enter. Not only does it take hours to enter them, you can have manual errors and also the nightmare of maintaining them. With the right WooCommerce plugin though you can quickly and easily import your shipping rates with a click of a button!

With our WooCommerce Table Rate Shipping plugin you can quickly and easily import and export all of your shipping rates. This allows you to perform bulk updates in a breeze! 

This handy plugin is packed with a whole host of features for shipping – in this article you’ll learn step-by-step how to import and export shipping rates into WooCommerce.


SETTING UP THE SHIPPING

In this example we’ll look at common use case of bulk importing UPS shipping rates into WooCommerce. The UPS rates are available from the UPS website. For simplicity we’ll just load the rates up to 35lbs but as you will see you can easily load hundreds of rates into the plugin.

Step 1: Setting up the Shipping Zone

We are going to limit our shipping to the US for simplicity. So the first thing we need to do is create a new shipping zone. Navigate to WooCommerce->Settings->Shipping 

If you have not set up any shipping zones you will see the following screen

WooCommerce Shipping Zones

Simply click on the “Add shipping zone” button and we can set up our first zone. For this example we will make our first zone the USA

Adding a shipping zone
Step 2: Adding a Shipping Method

Now we have our shipping zone set up, the next thing we will need to do is add a shipping method to it. We are going to be using a our Table Rate Shipping plugin in this example so we can go ahead and click the “Add shipping method” button. This will display a screen of the available shipping methods

Adding a shipping method

We will select “Table Rate Pro” from the dropdown and click the “Add shipping method” button. This will present us with the next screen

Shipping Methods

Now we can go into the plugin – click on the “Table Rate Pro” link and you will go to the main screen showing the shipping methods we have set up – in this case we have not set any up yet!

Main Shipping Screen
Step 3: Creating the Shipping CSV for Importing

Now we are ready to import we need to create the CSV file for importing.  In this example we downloaded some rates from the UPS website. Once we had them it took just a couple of minutes to format them into the correct format

The file needs the following columns

  • Method Title
  • Hide Other Methods
  • Handling Fee
  • Tax Status
  • Tax Status
  • Shipping Mode
  • Class
  • Condition
  • Min value
  • Max Value
  • Base Amount
  • Per Item
  • Per Oz
  • Label
  • Stop
  • Skip
Our file looks like this
UPS Example CSV File

If you would like to see this file you can get a copy of it by clicking here

Step 4: Importing the File

Now we are ready to import our file. From the main Shipping Options screen click the “Import” button

Shipping Import Button

From there click the “Choose File” button – which will bring up a file selection window. You can select the CSV file and then click the “Start Import” button.


Start Import Screen

This will load the rates into the plugin. Once it is complete you will see a screen similar to the one below

Shipping Rates Imported
Step 5: Start Using the Rates

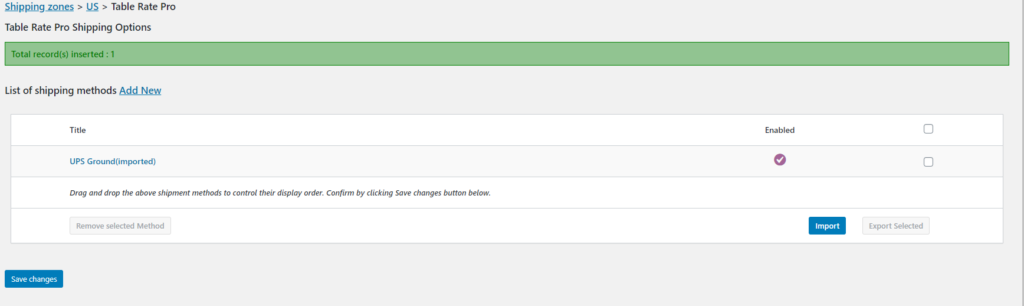
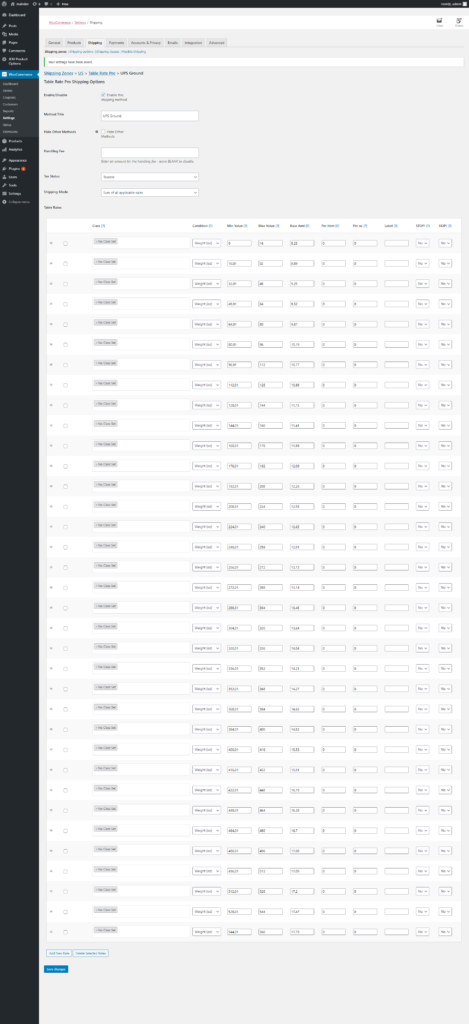
Now the rates have been imported we can go ahead and start using them. Clicking on the title will take you to the edit screen. The Method Title which is what he customer will see has the phrase “(imported)” added to it so you can easily identify which rates have been imported. We will want to remove that.

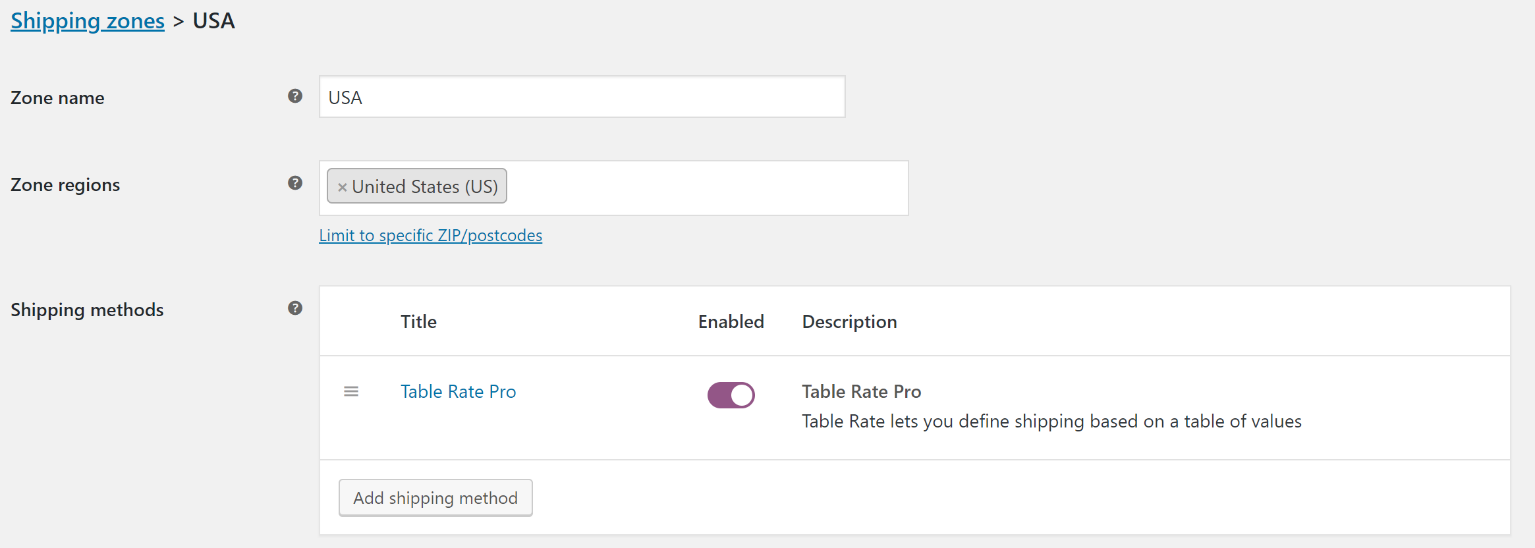
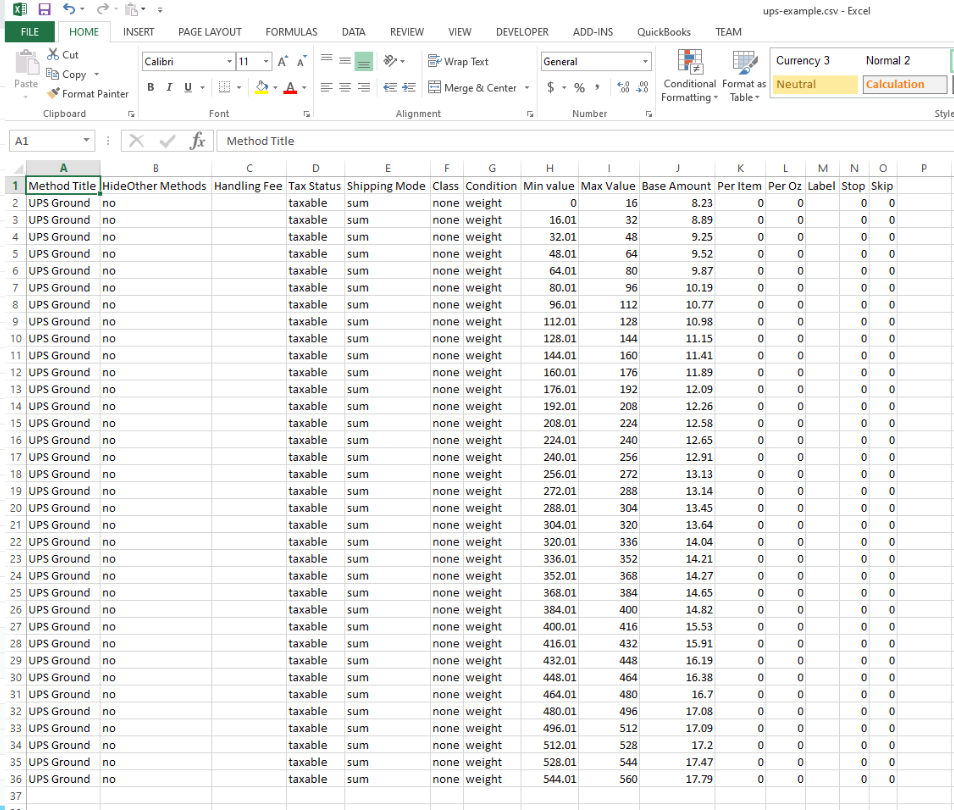
The completed Shipping Rates will look like this

Completed Shipping Rates

Now we can test them out. In this example we’ll create a product weight 8oz’s (half a pound) and will use that in our example.

When we have 3 items in the cart it should calculate the rate for between 1 – 2 lbs (16.01 – 32 oz’s) of $8.89 – see the screenshot below


Example Shipping 1

If we have 25 items in the cart it should calculate the rate for between 12 – 13 lbs (192.01 – 208 oz’s) of $12.26 – see the screenshot below

Example Shipping 2
Summary

As you can see this plugin makes it extremely easy to import shipping rates into your WooCommerce store. If you’d like to find out more about this amazing plugin then you do so by clicking here.

Thanks for taking the time to read this – please leave us a comment or contact us – we’d love to hear from you.


Share this post

Share on facebook
Share on google
Share on twitter
Share on linkedin
Share on pinterest
Share on print
Share on email
Scroll to Top
Scroll to Top