WooCommerce Order Export
This plugin provides you with the ability to export your orders, customers, coupons and more from your WooCommerce store.
Whilst every store is unique and has its own individual needs, the plugin has been designed to provide enough flexibility to cater for your stores needs
If you need help at any time with this plugin you can reach us at https://jem-products.com/contact-us/
Installation
Your plugin is delivered as a zip file. WordPress makes it easy to install the plugin from this zip file. You need to make a note of where you have saved your zip file to on your computer.
If you are using the free plugin – please goto Plugins on your WordPress dashboard and deactivate it.
From your WordPress dashboard goto “Plugins” the “Add New”
Towards the top of the page you should see an “Upload Plugin” button – see the screenshot below
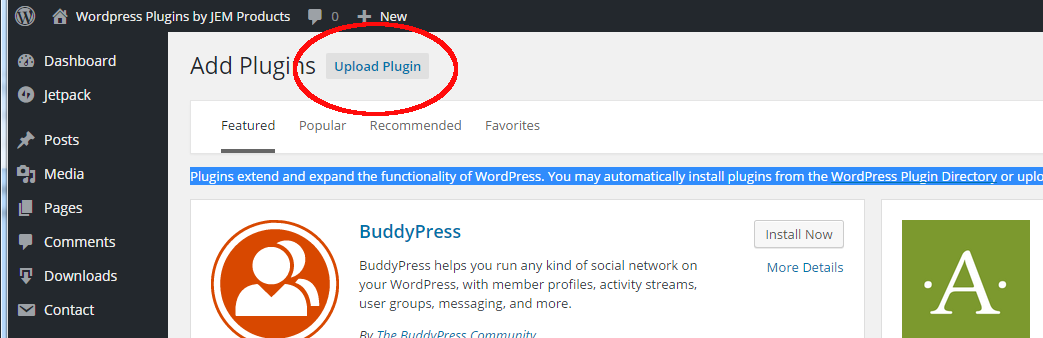
Click the “Upload Plugin” button, then from the next page click the “Choose File” button and select the zip file that you saved.
Getting Started
The Order Export plugin can be accessed from the WooCommerce menu – you will see an entry called “Order Export+ PRO”
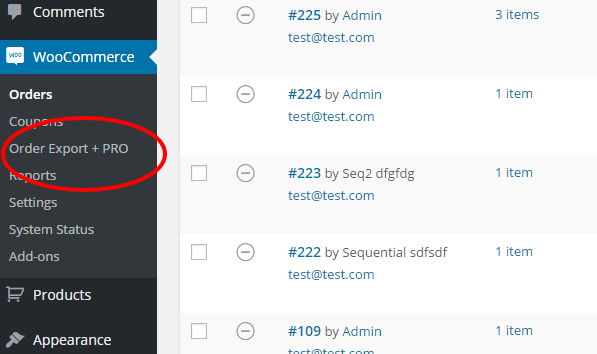
Selecting this menu option will bring up the main screen.
There are 3 tabs at the top that allow you access the various key parts of the plugin
Settings
The Settings tab allows you to specify some key options that will be used across the plugin. the items you can change are:
Filename: You can specify how the filename is created
Character Encoding: If you need some special character encodign you can select it here – if you are unsure just leave it as it is!
Date Format: How do you want your dates formatted?
Field Delimiter: What character will separate values on your CSV file? The default is a comma
Archives
The Archive tab contains all of the scheduled exports that have run – you can download them or delete them here
Exporting Data
To export data you simply go through the following easy steps:
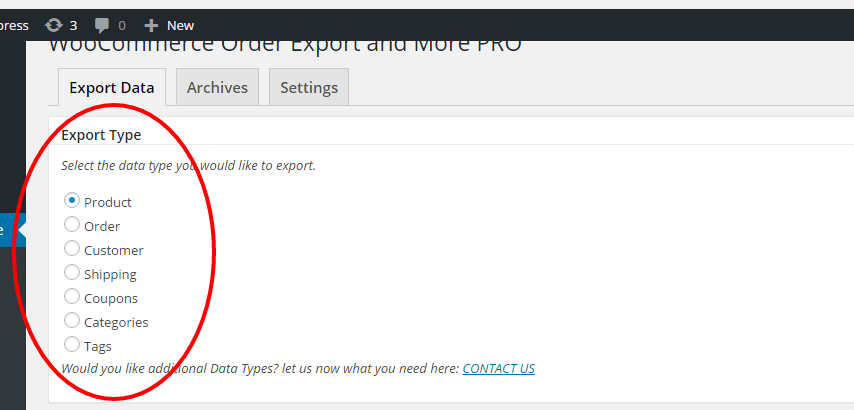
1. First select the type of export you would like.
2. Field Selection
Next you select the fields you would like to include in your export. Simply check the checkbox next to each item that you want/don’t want
If you click the “Save as Default” button then the fields you have selected will automatically be populated next time you export the same data type
Meta Fields
At the bottom of the fields you will find the Meta Data box. In this box you can add any data that might be stored in the meta table (wp_postmeta). A lot of plugins will store data here and by using this technique you can gather the appropriate data.
You simply enter the meta name (i.e. meta_key) of the item you are interested in and the plugin will grab it from the “post_meta” table. Enter each item you want on a separate line.
So for example if you enter “_customer_user_agent” when exporting orders you’ll get the user agent info (browser, OS etc)
Meta field functionality exists for Products and Orders only.
3. Select Any Filters
Click the “Filters” tab to see the filters that are available for the data type you are exporting. Each data type has it’s own set of filters. Here are the filters available for Orders for example.
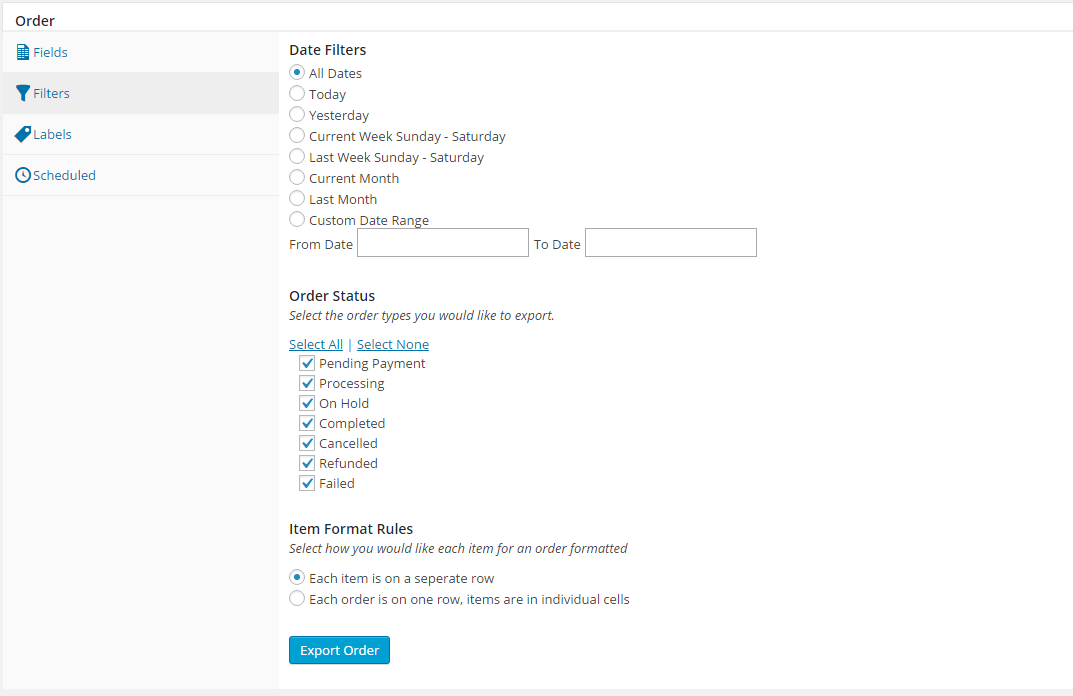
You can select the filter that makes sense for the data you are trying to export.
4. Change Any Labels
The Labels tab allows you to change the column heading that is used for each data item. The defaults should be sufficient but if you need specific names then change them here – please remember to hit the “Save Changes” button. Your labels will be remembered and used when you next export this data type.
5. Export!
Return to the Fields tab and hit the Export button. Your query will run and the results will available for you to download.
Scheduling An Export
One of the key features of the WooCommerce Order Export plugin is the ability to have exports automatically run and the results emailed to you or saved in your archive.
Once you have selected the data type you want to schedule an export for, simply select the “Scheduled” tab (see below)
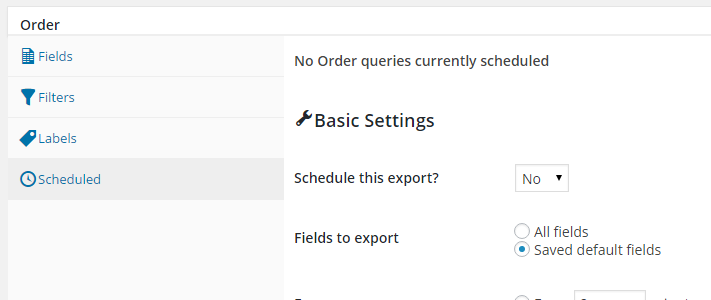
From there you will be able to specify the frequency and timing of your export as well as set the filters. The automated export will use your default fields that you have set up for this datatype.
As always if you have any questions we can be contacted here.